If I were rich, the solution would probably have been to buy a gorgeous, luxurious wardrobe like the kind I imagine transported the Pevensies to Narnia. Then I could fill it with fur coats, crawl in, and pretend I felt snow and pine needles. And, maybe, just maybe, I could wish hard enough to actually make it happen! *sigh* #NerdProblems
However, I am a graduate student. I am married to a graduate student. We are not rich. We are not even close to rich. In fact, while I was voted "Most Likely to Be a Millionaire" (What?!?!) in my high school class, I am probably the closest to being a million dollars in debt! Ah!
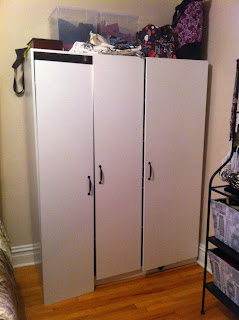
Therefore, the solution was to buy a cheap IKEA wardrobe. And, as luck would have it, we found this one for $80 in the As-Is department! Woo-hoo! It had a couple of dings and was missing a handle (we found cheap replacements elsewhere), but, in my opinion, that was totally worth the $45 we saved by not buying it in the box. We had to disassemble it ourselves before fitting it in our car, though (one of the caveats of the IKEA As-Is dept). That made it slightly less worth it. Still, it was a bargain!
I didn't remember to take a 'before' picture until I
had already taken the first door off! Oops!
I researched to see what some other people had done with theirs (thanks Google Image search!), and I had about a million fun ideas of my own. The problem is that we are in a tiny apartment with very little workspace and no great place for doing any of the cool painting projects I had in mind for it (also, I knew my husband would complain about the paint fumes). So I went with the quick, simple, cheap, staple-fabric-to-it route.
If you do not currently own a staple-gun, BUY ONE! You can transform so many things so easily with it! It's absolutely my favorite tool!
Obviously disassembling was the first step in the process.
So, you can see what the interior looks like.When I open the doors, I can see ALL of my clothes at once, which has seriously reduced the I-Have-Nothing-To-Wear Syndrome recurrence rate! The polka-dot boxes on the middle shelf have my seldom-used smaller articles of clothing, and the dark things sitting on top of that are actually drawer organizers from The Container Store to organize my undergarments.
Please don't judge my tendency to fail in the
folding and neatly stacking clothes categories.
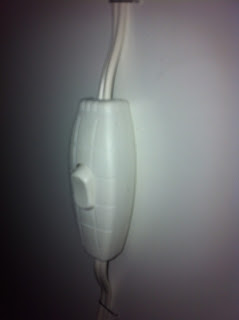
While I'm showing you the inside, allow me to show off my awesome husband's handiwork. He installed lights with switches for me! He just stapled the cord to the top and sides to keep it out of the way and to put the switch in an easily accessible location.
So, back to the project. Anytime you plan to staple, hot glue, or otherwise attach a piece of fabric to something, YOU MUST IRON IT FIRST! I have neglected this step in previous projects and always regretted it.
Also, remember to make sure the pattern is facing the right direction. I very nearly stapled this on with the stems pointing down. Um, that would have looked dumb. I'm sure that, for most of you, things like this are merely second nature. Me? I need some help sometimes. My husband and I once worked together to staple some new fabric onto chair cushions, and we each stapled them in different directions.
I recommend using a large-scale patterned fabric on large pieces of furniture. Smaller-scale patterns work better with smaller pieces or as a 'background'.
Here you can see another modification we made, which was to install a full-length mirror on the inside of one of the doors. Thanks to my husband for doing that!
So, another pointer: be sure to pull the fabric taught before stapling it. This is actually easier to do with two people. One person pulling it tight, and the other doing the actual stapling. However, it is feasible alone. I actually did this one by myself.
Also, be sure to leave screw holes uncovered on the back.
It looks like there are ripples in the fabric in this
picture, but I think that was just a lighting issue.
It doesn't look like that in person!
I used scissors to poke holes through the fabric covering the screw holes for the handles.
After re-installing the doors, this is the finished product!
I had intentions of lining up the patterns between the doors. That didn't really work out so well. Oops. I'm thinking about buying more and trying again, so if I find a reliable method for aligning the pattern I will share that with ya'll!
My husband and I both looked at it and realize the side needs to be painted to match one of the colors in the fabric. I'm thinking black or green. If I ever get around to doing that, I'll post pictures for you.


No comments:
Post a Comment