Little Sheldon

Little Sheldon
The cutest dog ever

Saturday, June 22, 2013

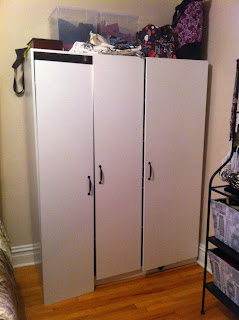
Latest IKEA hack: DOMBAS Wardrobe

About a year ago I decided that I was tired of having a little (and I mean little) closet and dealing with having a really ugly, old dresser.  Also, I have decided that I hate storing clothes in drawers because I can't actually see anything but the top few items!  No wonder I had so many I-have-nothing-to-wear moments!

If I were rich, the solution would probably have been to buy a gorgeous, luxurious wardrobe like the kind I imagine transported the Pevensies to Narnia.  Then I could fill it with fur coats, crawl in, and pretend I felt snow and pine needles.  And, maybe, just maybe, I could wish hard enough to actually make it happen!  *sigh*  #NerdProblems

However, I am a graduate student.  I am married to a graduate student.  We are not rich.  We are not even close to rich.  In fact, while I was voted "Most Likely to Be a Millionaire" (What?!?!) in my high school class, I am probably the closest to being a million dollars in debt!  Ah!

Therefore, the solution was to buy a cheap IKEA wardrobe.  And, as luck would have it, we found this one for $80 in the As-Is department!  Woo-hoo!  It had a couple of dings and was missing a handle (we found cheap replacements elsewhere), but, in my opinion, that was totally worth the $45 we saved by not buying it in the box.  We had to disassemble it ourselves before fitting it in our car, though (one of the caveats of the IKEA As-Is dept).  That made it slightly less worth it.  Still, it was a bargain!

I didn't remember to take a 'before' picture until I 
had already taken the first door off!  Oops!

 So, as you can tell, it is extremely boring!  I am a fun person.  I do not do boring!

I researched to see what some other people had done with theirs (thanks Google Image search!), and I had about a million fun ideas of my own.  The problem is that we are in a tiny apartment with very little workspace and no great place for doing any of the cool painting projects I had in mind for it (also, I knew my husband would complain about the paint fumes).  So I went with the quick, simple, cheap, staple-fabric-to-it route.

If you do not currently own a staple-gun, BUY ONE!  You can transform so many things so easily with it!  It's absolutely my favorite tool!

Obviously disassembling was the first step in the process.


So, you can see what the interior looks like.When I open the doors, I can see ALL of my clothes at once, which has seriously reduced the I-Have-Nothing-To-Wear Syndrome recurrence rate!  The polka-dot boxes on the middle shelf have my seldom-used smaller articles of clothing, and the dark things sitting on top of that are actually drawer organizers from The Container Store to organize my undergarments.

Please don't judge my tendency to fail in the 
folding and neatly stacking clothes categories.

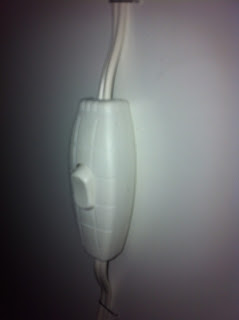
While I'm showing you the inside, allow me to show off my awesome husband's handiwork.  He installed lights with switches for me!  He just stapled the cord to the top and sides to keep it out of the way and to put the switch in an easily accessible location.


So, back to the project.  Anytime you plan to staple, hot glue, or otherwise attach a piece of fabric to something, YOU MUST IRON IT FIRST!  I have neglected this step in previous projects and always regretted it.


Also, remember to make sure the pattern is facing the right direction.  I very nearly stapled this on with the stems pointing down.  Um, that would have looked dumb.  I'm sure that, for most of you, things like this are merely second nature.  Me?  I need some help sometimes.  My husband and I once worked together to staple some new fabric onto chair cushions, and we each stapled them in different directions.

I recommend using a large-scale patterned fabric on large pieces of furniture.  Smaller-scale patterns work better with smaller pieces or as a 'background'.


Here you can see another modification we made, which was to install a full-length mirror on the inside of one of the doors.  Thanks to my husband for doing that!


So, another pointer: be sure to pull the fabric taught before stapling it.  This is actually easier to do with two people.  One person pulling it tight, and the other doing the actual stapling.  However, it is feasible alone.  I actually did this one by myself.

Also, be sure to leave screw holes uncovered on the back.


It looks like there are ripples in the fabric in this
picture, but I think that was just a lighting issue.
It doesn't look like that in person!

I used scissors to poke holes through the fabric covering the screw holes for the handles.


After re-installing the doors, this is the finished product!


I had intentions of lining up the patterns between the doors.  That didn't really work out so well.  Oops.  I'm thinking about buying more and trying again, so if I find a reliable method for aligning the pattern I will share that with ya'll!

My husband and I both looked at it and realize the side needs to be painted to match one of the colors in the fabric.  I'm thinking black or green.  If I ever get around to doing that, I'll post pictures for you.

Thursday, June 20, 2013

First Book Review: The Mortal Instruments series by Cassandra Clare

If you've never heard of the Mortal Instruments, you must not be a teenage fangirl.  I'm not a teenage fangirl, but sometimes I act like one.  Things that bring out my inner fangirl are: The Chronicles of Narnia books (too bad the movies are horrible, particularly this one); Jane Austen; Joss Whedon; Doctor Who; and, most recently, The Mortal Instruments!  (Yes, I do enjoy Harry Potter. I think the books will be around for ages. I'm just not obsessed with it.)

Notice what wasn't on the list?  Twilight.  That's right.  I've read them, sure.  Everyone told me how "great" they supposedly were.  Um...everyone was wrong.

I get the appeal of the stories -- that kind of obsessive romance satisfies something in the crazy part of the typical female brain (no, I am not saying we women are crazier than men...there's a crazy part in the typical male brain, too).  When we engage the rational parts of our brains we go, "Ew! What's up with Cullen the creeper?  And werewolves falling in love with babies?  Ick!"

So, when you inevitably start hearing people compare The Mortal Instruments (TMI) to Twilight in August, tell them Kara says they're crazy if they don't think TMI wins by a longshot.  This comparison is only natural, as they are from the same genre.  However, TMI kicks Twilight's butt.

Okay, sorry, I had to get that out of my system.

Now I can start the actual review!

TMI is a series written by Cassandra Clare about a race of people called Shadowhunters (AKA Nephilim).  The Nephilim are demon (monster) hunters who have descended from Jonathon Shadwohunter -- a man given angelic blood by the angel Raziel.  So, you can see where we're going with this: into total Nerd-Land (AKA Awesome-Land)!

In the first book, City of Bones, Clary Fray thinks she's a normal girl, but then she suddenly starts seeing really weird stuff everywhere.  And, for some reason, this blonde Shadowhunter kid named Jace starts following her around.  Well, Clary's mom is kidnapped, Clary gets attacked by a demon (and she kills it!  Woo-hoo!), and, to nobody's surprise, it turns out she is, in fact, one of the Nephilim.  Also, there is a human kid named Simon and some more Nephilim named Isabelle and Alec.  Everyone is good-looking, and there are lots of unrequited crushes and other appropriately angsty teenage problems.

The story is really predictable.  In fact, I knew how it would end when I was halfway through.  The funny thing is, I didn't care.  Even if the plot wasn't intriguing enough to keep me guessing, I still wanted to spend time in the story and connect with the characters.  It's not great literature, but it is great entertainment!

The next couple of books were only slightly less predictable.  (FYI, I know some people who don't think they are predictable at all.  I'm not alone in my opinion, though.)

The best thing about these stories is that they are well-written: they are fast-paced without neglecting character development; there are plenty of sub-plots to add depth; you won't be able to get enough of some of the characters (Magnus Bane, for example); and, well, there are a lot of great action sequences and battles.  Oh, and, unlike Twilight, people actually die in these battles.  The best fantasy novels need to run the gamut of human emotion as often as possible, and these books come pretty close.

There is something really appealing about urban fantasy.  It lets you daydream about another world existing within our everyday reality.  I've always found it appealing when characters are plucked out of our typical set of human experiences in this life and exposed to a whole new world or reality, whether that world is found in a wardrobe, modern-day New York City, or in a bigger-on-the-inside British police box.

So, to summarize: The Mortal Instruments are good, and if you like YA fantasy at all, you should definitely read the books and watch the City of Bones movie in theaters in August!  Hooray!

Note: Currently, there are five TMI books, and a sixth is in the works. Cassandra Clare has another series of Shadowhunter books, The Infernal Devices, a prequel to TMI, which is complete and comprised of three books.

Thursday, June 13, 2013

$199 Acer C7 Chromebook, 16GB SSD, 2GB RAM

A few weeks ago, I was working on a paper with my dog sitting next to me trying to get my attention.  Apparently, he was jealous of the laptop getting more attention than he was, because he jumped up and pushed the computer onto the floor.  The screen broke.  A large chunk of my was paper gone.  Great...

I needed to buy a cheap replacement to finish the paper on while mine got fixed (thank goodness we bought the Best Buy protection plan!).  The cheapest option was a $199 Chromebook (list price) at Best Buy.

Here are my thoughts so far on the Acer C7 Chromebook (16 GB SSD version -- just released) I bought to finish my paper.  It seems to be worth the $200.  It is the size of those netbooks that seem to be disappearing from stores, so it is very lightweight.  This particular device has a piece of junk touchpad, but a decent keyboard.  Also, because of the solid state drive, I can use it all day without it getting hot.  The battery life is decent, not great: It's lasted me between three and four hours, usually closer to four than three.  I'm not the best person to ask about screen quality.  But, hey, it's $199! And that's the regular price! If you're only spending $199, I'm guessing you're not picky about hardware.

In case you're unaware, the Chrome OS is basically just a Chrome browser.  This means no Microsoft Office, no Adobe, no iTunes, no real programs aside from Chrome.

There are more advantages to this slimmed-down OS than you might think: the computer boots in about 20 seconds or less; it is extremely simple and easy-to-use; pretty much everything is automatically backed up in the cloud; you don't need antivirus; and you won't be tempted to spend all that money on the latest version of Office (Google Docs is more than adequate for most people, and pretty compatible with Microsoft Office--I've only had minor formatting issues).  Also, you can find apps and websites that will perform most of the basic functions you would have done on a laptop, anyway.

The disadvantages are pretty obvious: you need an internet connection to do much of anything; there is very little flexibility (note the aforementioned list of programs that are unavailable); there is very little storage space on the computer; and you have to have a Google account to do much of anything.

Basically, it's a good supplemental computer, and it's meeting my needs in my current "emergency" (i.e. Sheldon destroyed my laptop).  I would consider it a good tablet alternative or a great option if you're looking for portability or a 'back-up' device like I was.

Sunday, May 12, 2013

My Husband Thinks it's Crazy

But I don't care.  I do it anyway.

I don't know anybody else who does this, and you might think I'm nuts, too.  Nobody will ever get me to stop, though.

What is this absurd thing I do?  I keep my socks in the living room.  The only socks I have in the bedroom are the ones in the dirty laundry.  My clean socks are kept by the front door.


I don't wear socks at home, just when I'm putting shoes on.  So it makes sense to keep them near my shoes (which I keep in the front closet).  If it's the last thing I put on before I leave, it makes perfect sense to me that it should be close to the door!

Yes, that is smelly foot spray in there.  Don't judge.  Ballet flats make your feet stink, too, and you know it!

The top two drawers now are labeled on their upper edge (hidden when the drawers are closed) so I'm not tempted to just turn them into junk drawers.  Otherwise, I'll be back to the days when I would stress when I was in a hurry because I couldn't find what I needed in the drawers.  I would have to sift through a bunch of junk to find my keys and whatnot.  

Thursday, May 9, 2013

Organizing Project and Another IKEA Hack: Bookshelves

A while back, I wanted to put a bookshelf in the awkward little space in the middle of our apartment.  Matt calls it a "hallway" because it connects all of our rooms, but there is no actual hall.  It's just a little space with four doors and a little bit of wall space.  I really didn't want it to function as "wasted space," so a bookshelf to store our office supplies seemed like a great solution.  The problem?  The only wall big enough for the shelves was the wall with the intercom.  If we covered that up we would have quite a bit of difficulty buzzing people into our apartment!

My parents gave us a super-cheap IKEA bookshelf a few years ago that they were no longer using.  The only real problem with having it in a very visible place like this was that, well, it looks as cheap as it actually is.  So, I had to try to spruce it up a bit.  And make a few other alterations.
Hey, look, my dog wandered into the photo.  :-)  Please ignore the picture frame sitting behind the dog.  That is for a future project.

The back of the bookshelves was a really flimsy, plastic-like material, which looked awful but had one distinct advantage: it was incredibly easy to rip off and cut with a utility knife.  So that's what I did!  I took it off of the back, made the appropriate measurements, and cut a whole where the intercom would be.

I could have just nailed or stapled it back onto the frame like that, but I wanted something a little more interesting.  I had a few yards of a material left, so I took out my trusty hot glue gun (I love that thing!) and went to town!  I'm not overly in love with the pattern on there, but I didn't want to go buy new fabric when I had something perfectly useful.  I can be cheap like that.

Here are a few close-ups of the project.

This is the hole I cut for the intercom.

Here you can see our mail center and bill organizer.  The trash can sitting next to the bookshelf in the top picture is specifically designated as a receptacle for all of the mail that needs to be shredded.  This way it all gets sorted in one place!


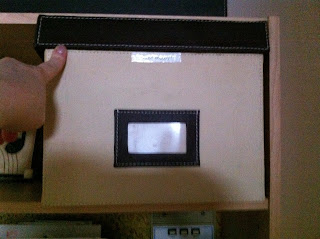
Could I have put a label in the little holder on the front?  Yes, but my handwriting is ugly, and typing up a label and printing it out seemed like too much effort.  I like making things easy.  Label maker to the rescue!  When the lid is closed the label is hidden.  I already know what's in it, but putting a label on it makes me think twice before throwing things in there that don't belong.

Lazy Susan from Home Goods, one of my very favorite places to shop!  Nearly everything on these shelves is actually from Home Goods!  They have really cheap and pretty organizational products.  If you're looking for attractive storage options, definitely check out Home Goods!  If you don't have one in your town, T.J. Maxx and Marshalls are part of the same company and often have the same items.

The little plastic box with the markers in it is from The Container Store, which is another one of my favorite stores!  The good news there is that if you don't have a store nearby, you can shop on-line.  I strongly recommend it.  :-)  I love their stuff, including their clear plastic boxes like this one.

Hopefully somebody out there will be inspired to be creative and have some fun with their own organization projects!


Tuesday, May 7, 2013

DIY Picture Frame Thingies

I've had a few people, Matt included, who have commented that they think my bookshelves look really cool.  I do love them myself.  There's a kind of homey, inviting feel that is still interesting and exotic.  Here is what they look like.
I'll have to take a picture in better light and upload it for you.  This one is really washed out.

Most of the (non-book) stuff is from Home Goods or Hobby Lobby, so it was all really cheap.

The DIY part is the two picture frames you see sitting on the top.

This was probably the easiest thing ever.  And they make an impact that is significantly larger than their price tag!  I got the gold frames from a garage sale for about $5.  They were sitting under our bed for a couple of years because the frames didn't have backs.  I bought them because I liked them, but I had no idea how I was going to use them!

Then, during a trip to Hobby Lobby looking for fabrics, I was inspired!  I remembered seeing an episode of Design on a Dime where they had covered a basic wooden frame with fabric and hung it on the wall.  Why couldn't I just staple fabric to the back of these frames?  So, I found fabrics with the same colors and themes that would fit with each other, and I stapled away!

I'm actually pretty proud of these.  Guests regularly comment on them, and even Matt (who sometimes pretends like he is oblivious to all things aesthetic) has said that he really likes them.  Woo-hoo!  Success!  For about $10!

Thursday, May 2, 2013

First IKEA Hack: DVD/Video Game Shelves for a Small Collection

I really wanted a way to organize and store our DVDs, but a lot of the media storage I was seeing was made for WAY more DVDs and games than we actually own.  So, Matt and I went on an IKEA treasure hunt.

I'll explain what we did, but his is the final result.

These are actually designed to be hung vertically, and they are in IKEA's bathroom storage department.  They're called LILLĂ…NGENand they're intended to go with these cabinets.

I was being really cheap (remember that student budget we're living on?), so we went with the boring brackets.  They're only 50 cents each.  It could be way cuter if you used some of the fun brackets from IKEA, like these.  You can still see the silver screws, and I'm planning to cover those up with paint or something.

Really, we just assembled the shelves according to the directions, decided which side we wanted to be the "bottom," and drilled a few holes for the brackets.  Not too complicated.  Well, aside from the usually difficulty of deciphering IKEA's wordless instructions.

It's the perfect size for our limited movie collection, and it only took a couple of hours.